DIY Wednesday! | How to Make Art from Gift Wrap
Hey Fellow Crafters!
Today, we're sharing one of our favorite ways to reuse gift wrap. If you're anything like us (ahem, a craft hoarder); then you know how hard it is to throw away a pretty piece of paper! So, instead, let's repurpose it! Check out the instructions below.
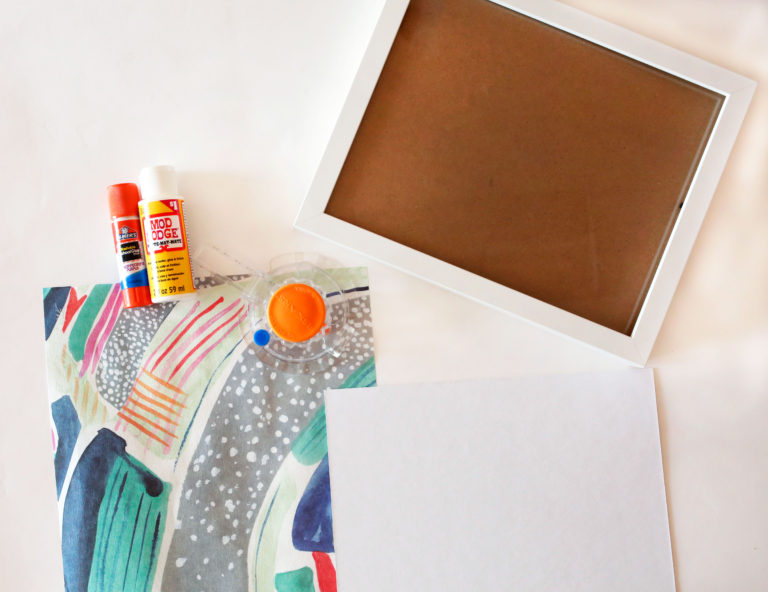
Materials Needed:- Glue Stick
- Mod Podge (optional)
- Gift Wrap
- Circle Cutter (We used a Fiskars Circle Cutter)
- Cutting Mat ( Cardboard will work)
- 8.5x11 White Cardstock or Heavy Paper
- 8.5x11 Frame
 Step 1: Set the circle size on your Fiskar Rotary Cutter. (We set ours to 1.5"). Place Gift Wrap on cutting mat and select areas to cut out.
  Step 2: Cut out 12-15 circles from the gift wrap. Pictured below is Thimblepress’s “Stripes Aqua Gift Wrap.”
  Step 3: Once you have all the circles cut out, begin arranging them onto a 8x10 piece of cardstock paper.
 Step 4: After you've finalized your arrangement, glue each circle down with a glue stick.
  Step 5 (optional): If you want a glossy coating, apply one layer of of Mod Podge over the top of the work.
  Step 6: Once everything has dried, place your completed artwork into an 8.5 x 11 frame.
  Step 7: Hang your new piece of artwork the wall!
We have five different Gift Wrap collections that all feature original hand painted designs. Check the whole collection out HERE. Leave us a comment and let us know how your piece turned out!
Happy crafting!
Team Thimblepress


Leave a comment